Hey Guys #admin_saurav_Giri here from Essential hack in your life.
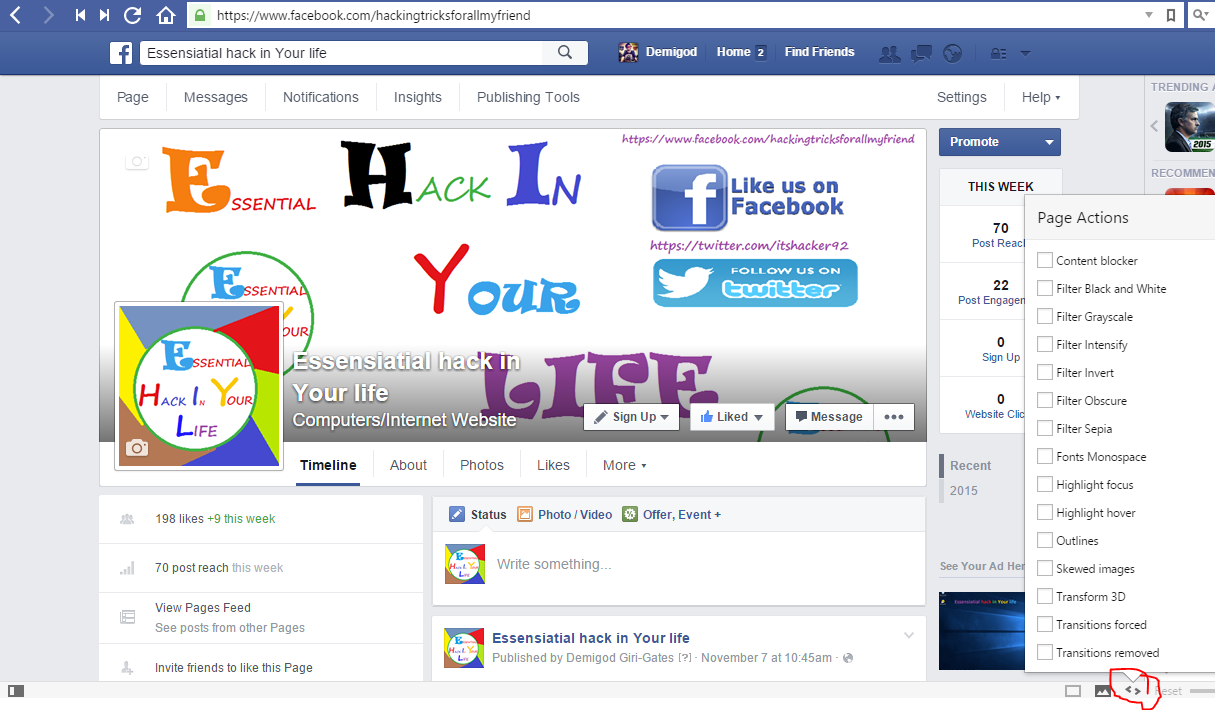
Many of you are bored from the default font of your web browser.
Today I will suggest YOu to download a new browser which speed is awsome.
and show you how to change the font of ANY WEBSITE.............
Hello Friends Welcome Saurav Giri from Essential Hacks In your Life
TODAY I AM GOING TO SHARE A WONDERFUL HACK ON WIFI, USING THIS WE CAN HACK A WIFI WPA/WPA2 – WPS WITHIN SECONDS, THE EASIEST AND BEST WAY TO HACK WPA NETWORKS. WHAT IS WPA/WPA2 :
REQUIREMENTS:
1) Laptop or USB wifi Adapter 2) Windows Operating System 3) Wincap 4) JumStart 5) Dumpper 6) NetFrameWork 4.5 7) Wpa/Wpa2 – WPS Networks Available with at least 8% signal
Download and Install all the Above Given Software’s one by one, even If a single software is missing out hack cannot be successful, be careful in downloading and installing these software’s.
Now Here I Start Our Tutorial on Hacking Wifi WPA/WAP2 – WPS Networks In Windows Using JumpStart And Dumpper
Tutorial To Hack Wifi WPA/WPA 2 - WPS Networks
1) After Downloading and Installing all the Software’s Open Dumper (No need of Installing Dumper, whenever you want to hack open it ) 2) Select your Network Adapter Now Click on “Scan”, There you can see all the available Wifi Networks 3) Now Move on to the “WPS” Tab 4) Select “All Networks” 5) Now Click on “Scan” 6) Select a Network That You Want Hack 7) Now Click On Start JumpStart 8) JumpStart Will Automatically Start The Process And Complete The Hack 9) Now The Hack is Completed, You are already connected to the network that you Hacked 10)Click on “Profiles” to see the Details and Passwords of the wifi Networks That You Hacked 11)Select a Network and There you can find the details and passwords of the networks that you hacked 12)There is another method to see the password of the network that you hacked 13)Right click on the Networks and select “Open Network and Sharing Center” 14)Now click on the “Connection: Network Name” 15)Then the Properties of the Connected Network Will Appear, Now select “Wireless Properties” 16)Now move to “Security” Tab 17)Mark On “Show Characters” and the Password of the Wifi Network is Shown This is how a Wifi WPA/WPA2-WPS Network is hacked.
DNS stands for Domain Name System is used to as the medium to translate domain names to their respective IP addresses when a client initiates a request query. DNS stores the database of all the domain names and their IP addresses which are registered on the network.
Most of us are quite familiar with the term DNS or Domain Name System. DNS can be thought of as an attendance register for various websites present over the internet. In the case of DNS, it maintains the database of all the websites Domain Names and their IP (Internet Protocol) addresses that are operational all over the world.
Historical Notes
The origins of DNS date back to the time of ARPANET, when there were only a few computers to get an entry in the database. A HOSTS.TXT file was maintained by Stanford Research Institute, which constituted the data of all the machines, and was copied by all the host machines to remain updated.
Jon Postel from the Information Sciences Institute requested Paul Mockapetris to design the very first implementation of DNS, at the University of California, Irvine, in 1983. Then in 1984, BIND (Berkeley Internet Name Domain) was created by four students, Douglas Terry, Mark Painter, David Riggle, Songnian Zhou, for Unix machines. After some revisions made in 1985 by Kevin Dunlap, it was later ported to Windows machines, and is still the most widely used DNS on the planet.
Working Mechanism
To understand the basic working of DNS, let me guide you with an example of a hotel. Let us assume, you need to visit your friend at some hotel. Now, what will you do? You’ll reach the hotel reception and ask the receptionist for room number of your friend. In order to do so, you’ll need to tell the name of your friend to the receptionist, who’ll check the same in her database and satisfy you with the room number of your friend. She’ll also call your friend to confirm whether he is available or not.
Now, try to relate the example to working of DNS. In this case, you’re the client sending a request to a DNS server, the receptionist, and your friend’s name is the domain name and his room number is his IP address.
The receptionist will type your friend’s name in her computer containing the database of all the guests, called the Domain Name Space, if your friend is staying in the hotel she’ll tell you the room number, otherwise not. Similar thing happens, when you type the website name in your browser, the browser sends a request to the DNS server, if the website domain name is registered in the database with the DNS, then it’ll reply you with the IP address of the website you are trying to access, which is something like 117.234.214.14
Understanding the Domain Name and IP Address
Take the domain name, www.google.com. The naming convention moves from right to left and vice-versa for IP address. In the domain name for Google, first the DNS will check for com which stands for commercial domain, and is a top-level domain. Proceeding further, google.com, is a sub-domain to com and subsequently www, is a sub-domain to com domain. The dot (.) is used to separate the domains from their sub-domains. The full domain name can only consist of 253 characters.
Now, if some wants to know the domain name registered against an IP address, he will request the DNS server with the IP address of the website. Say, the IP address sent is 31.13.79.246, the DNS will first check the 31 then 13 then 79 and finally 246, concluding that the IP address belongs to www.fb.com. The DNS resembles the hierarchy structure of a tree, not the biological one, there is a different tree in computer data structures, in which the address 31 belongs to the top position of the tree and is the primary domain in the hierarchy, addresses 13, 79, 246 are consecutive sub-domains. The number 246 refers to the server machine hosting the website www.fb.com. All this domain and sub-domain thing is not that much complicated as you think, but it’ll take some time for you to get it correctly if you’re new to this concept.
Evolution of DNS
In earlier days, a master file was maintained by one main server which was updated manually with the entry of every new website and then it was copied by other servers. But, as the count of websites proliferated with time, it was hard to maintain the domain name database manually. So, the need of an automated system was felt and then the ability to automatically update the database all around the world was introduced in the newer generations of DNS.
So, if you register your website name with a Domain Name Registrar, it will take around 24 hours for your website to be present in the DNS databases all around the world.
The Master-Slave server relations were introduced in which a master server maintained the database and Slave server only had to copy the database to remain updated. In order to facilitate the dynamic updates to DNS database, the mechanisms NOTIFY and IXFR were introduced.
In NOTIFY, when the master server updates the database, it sends a notification to the slave servers about the update, which then copies the database. IXFR (Incremental Zone Transfer) eliminates the need to copy the whole database every time a single entry has been made, it allows the slave servers to only add the updated entry in their database, thus reducing the efforts and making the dynamic update process faster.
Resolving IP Address
It refers to the process of translation of a domain name to its respective IP address. The DNS resolver is the client PC, you in that hotel example, which sends the query to the DNS server, the receptionist. There are two methods used for resolution:
Recursive: Now continuing with the hotel example, assume the hotel has more than one branch in the city, and the receptionist was unable to find your friend’s room number. Then she’ll check if your friend has been staying in the other branch by contacting the receptionist present there. So, if the DNS server in unable to find any IP associated to the domain name sent in the query then it’ll ask the other servers connected to resolve the IP address for the requested domain. It’ll gather the information from those servers and reply to you with the appropriate IP address.
Iterative: Suppose you also want to know the floor on which the friend’s room is situated, in order to do so, you’ll again ask the receptionist. Similarly, if the DNS resolver wants more information about a domain, it’ll initiate a new query for the same DNS server.
DNS Cache
The DNS server temporarily stores the request queries in the form of Cache, so as to reduce the response time if any other DNS resolver requests the same query. The time for which the Cache information remains valid is called TTL (Time To Live), is set by the administrator for each query record stored in the cache.
DNS Applications
The first and foremost application of DNS is nslookup, in which a DNS server replies with the IP address of the domain name requested in the query. DNS is used by different Mail Transfer Agents (MTA) like Microsoft Exchange Server and IBM Domino, so that they can deliver the e-mails more efficiently.
DNS proves to be very helpful in identifying black-listed IP addresses over the internet and barring the users from accessing them. This helps in protecting the users from spam e-mails and potential hacking attacks.
The data for each domain name and its IP address is kept on more than one DNS server, so as to retrieve the data in case any problem occurs on one server.
DNS Vulnerabilities
Cache Poisoning: Also called DNS Spoofing, is the technique used by malevolent people, in which they alter the data in resolver cache of the DNS server, rendering incorrect IP address to DNS resolver, may be to divert the user to a hacker’s machine.
DNS responses are not encrypted thus allowing the possibilities of potential attacks. However, Domain Name System Security Extensions (DNSSEC) are used to render cryptographically signed DNS responses.
Phishing attacks can be planned due to visual resemblance of some characters on the user’s screen, like the letter l and 1 appear the same on some screens, thus redirecting users to different IP addresses by displaying the same look and feel as of the original website.
Use custom DNS
What if the that hotel receptionist is very slow and many people are asking for room numbers at same time, then she’ll not be able to provide you with correct room number quickly. So, you may ask some other person at the reception counter to attend your concern. Similarly, when we connect to the internet, we generally use the DNS Server provided by our ISPs. But what if the default DNS server is irresponsive or if it can’t handle a large number of queries at a given moment, such instances will only degrade your browsing experience. But don’t worry, there is another way out. You can configure your system to use a different DNS server for resolving IP addresses.
Popular DNS servers:
Google’s Public DNS: The search giant has set-up some serious high-grade DNS servers capable of handling millions of requests at any given moment. And they’re absolutely free to use like Google’s other services. You can configure your machine to use the following DNS addresses:
8.8.8.8 and 8.8.4.4
OpenDNS: This is a private company which provides safe and reliable DNS server for free. Just configure the following addresses on your machine:
208.67.222.222 and 208.67.220.220
Winding Up
DNS has been a topic of utmost importance since its advent as a systematic way to maintain such a huge database of millions of websites and servers around the world. Without DNS, it would’ve instigated a whole lot of mess of all the domain names and IP addresses, and it would’ve taken ages just to locate google.com from a haphazard collection of all the domain names. DNS has streamlined the process of IP resolution and seriously, if DNS wasn’t there, I know you would’ve burnt your brain circuits in order to remember all those IP addresses. And let me ask you, do you remember Facebook’s IP address I mentioned above. And don’t scroll up now, even I don’t remember it, because DNS is there to remember it for us. We only need to express our gratitude for the noble work DNS has been doing since the last three decades, and it has become faster, smarter and more reliable.
The humble Notepad of your laptop goes unappreciated many times. This little tool is capable of doing some amazing tricks with just few simple steps. In this article, I’m going to tell you my 10 favorite Notepad tricks.
What work do you perform with Notepad? Nothing much? Well, Notepad is a lot more than a simple text editor. Few lines of commands create interesting tricks that will definitely surprise you. In this article, I’ve compiled my 10 personal favorite tricks and shared it with you.
Check these tricks out and if you have some more, don’t hesitate to share with us.
Top 10 Coolest Notepad Tricks and Hacks for Your PC
1. Make Notepad your Personal Diary
Do you want a diary in your computer? Notepad can be turned into a personal logbook by simple steps. Everything you type will be saved with the particular date and time.
Follow these steps to make notepad your diary:
1. Open Notepad
2. In the first line, type “.LOG”
3. Save the file as “log.txt”
2. Password-protected Folder using Notepad
You can protect the files and folders in your computer by using this Notepad trick. A password-protected folder is created using few lines of code and you can keep your important stuff safe.
Type the following code. Instead of “fossBytes” written in the code, type in the password of your wish. Save the file as private.bat and choose File type as All Files (*.*). Double click on the file private.bat. A Private folder will be created in which you can move the files and folders that you want to protect. Now, a password will be required to open this folder.
@ECHO OFF title Folder Private if EXIST “Control Panel.{21EC2020-3AEA-1069-A2DD-08002B30309D}” goto UNLOCK if NOT EXIST Private goto MDLOCKER :CONFIRM echo Are you sure you want to lock the folder(Y/N) set/p “cho=>” if %cho%==Y goto LOCK if %cho%==y goto LOCK if %cho%==n goto END if %cho%==N goto END echo Invalid choice. goto CONFIRM :LOCK ren Private “Control Panel.{21EC2020-3AEA-1069-A2DD-08002B30309D}” attrib +h +s “Control Panel.{21EC2020-3AEA-1069-A2DD-08002B30309D}” echo Folder locked goto End :UNLOCK echo Enter password to unlock folder set/p “pass=>” if NOT %pass%==fossBytes goto FAIL attrib -h -s “Control Panel.{21EC2020-3AEA-1069-A2DD-08002B30309D}” ren “Control Panel.{21EC2020-3AEA-1069-A2DD-08002B30309D}” Private echo Folder Unlocked successfully goto End :FAIL echo Invalid password goto end :MDLOCKER md Private echo Private created successfully goto End :End
3. The Matrix Effect
‘Matrix’ movie fan? Create your own window of random strings of green digits displayed all over.
Type the following code, save the file as .bat, open the saved file and see the Matrix magic! (You can find the saved file by performing a simple search in start menu).
@echo off color 02 :start echo %random% %random% %random% %random% %random% %random% %random% %random% %random% %random% goto start
4. Shutdown your Computer with a Message
Don’t you find the process of shutting down too tedious? Open Start menu, Click on Turn Off button, Click Ok! Why not just double click an icon! Follow the steps and you can shut down your system by just double clicking on an icon. Also, a message of your choice will be displayed.
Open Notepad, type the following code and save the file with any name but with extension .bat
@echo off msg * Computer will now shut down shutdown -c “Sweet Dreams. Take care.” –s
5. Pop out the CD Drive continuously
Play a prank with your friends and make their computer’s CD drive open and close repeatedly.
Open Notepad, type the following code and save the file with extension .vbs Then open the file. It will make CD drive pop out continuously. To stop the process, open Windows Task Manager (Ctrl+Alt+Delete) and end wscript.vbsprocess.
Set oWMP = CreateObject(“WMPlayer.OCX.7?) Set colCDROMs = oWMP.cdromCollection do if colCDROMs.Count >= 1 then For i = 0 to colCDROMs.Count – 1 colCDROMs.Item(i).Eject Next For i = 0 to colCDROMs.Count – 1 colCDROMs.Item(i).Eject Next End If wscript.sleep 5000 loop
6. Text to Speech using Notepad
What if your computer speaks what you type! Follow these steps and Notepad will speak to you:
1. Open Notepad and type the following command.
Dim message, sapi message=InputBox(“What should I speak?”,”Speak to me”) Set sapi=CreateObject(“sapi.spvoice”) sapi.Speak message
2. Save the file as speak.vbs
3. Open the file, type the sentence you want Notepad to speak and click OK.
7. Shortcuts for Changing Header and Footer in Notepad
Open Page Setup from File menu and use the following codes in the header and footer fields for the particular purpose:
&d Print the current date &t Print the current time &f Print the name of the document &p Print the page number
&l Left-align the characters that follow &c Center the characters that follow &r Right-align the characters that follow
8. “Bush hid the facts” Trick
This trick is one of most popular tricks of Notepad. Follow these steps to use the trick:
1. Open Notepad.
2. Type “bush hid the facts” or “this app can break”.
3. Save the file and close it.
4. Open the file again.
What happens is when you open the saved file again, you see some different characters instead of what you had typed and saved (i.e. bush hid the facts or this app can break). This happens due to 4-3-3-5 string length bug in old versions of Windows.
9. Toggle Capslock
You can make the Capslock key of your keyboard toggle repeatedly by just typing a simple code in the Notepad.
Type this code in Notepad and save the file as .vbs Open the saved file. See what happens on using Capslock key
Set wshShell =wscript.CreateObject(“WScript.Shell”) do wscript.sleep 100 wshshell.sendkeys “{CAPSLOCK}” loop
10. Fake Windows Error Message
Type the following command in Notepad and save the file as error.vbs then Open the saved file and your fake error message will appear.
X=Msgbox(“Press OK and Windows will restart now.”,0+16,“There is a serious problem in your system”)
Surfing the internet has been a daily routine in this competitive
world.Do you surf the Internet like your grandma does, very slow with
everything you do, is by doing the hardest way of surfing the web with
clicks and scroll. Well, using the hacker tips below you can surf the
web like a pro.
1. Reopen the last tab that you accidentally closed.
Use Command+Shift+T for Mac OS and Control+Shift+T for Windows. This
works with Chrome and Firefox. This is perfect for when you’re comparing
products on competing websites and accidentally close the wrong tab.
2. Open incognito windows to simultaneously use two Google accounts.
According to Microsoft in 2011, the average person in the US had 3
email accounts; chances are, that number has only gone up since then. A
few years back, Google made all their products available to one login
username. This means you can use Gmail, Hangouts, YouTube and Drive with
the same username. What if your YouTube account and Gmail are on
different email addresses? Instead of logging out, use a incognito
window to be in both accounts at the same time. Use the short cut
Command+Shift+N to open a incognito window in Chrome or a private window
in Safari and Firefox.
3. Use password mangers so you never have to remember or type in a password again.
Password managers like LastPass and Mitro are great ways to save time
and frustration. Password managers work as a plug-in for Chrome or
Firefox. To use them, simply sign in to a website like Facebook or Gmail
and the manger will ask you if you want to save that password for
future use. It works across multiple computers so you can have the same
passwords saved at work and at home. Companies have the option of
setting up a company account so all passwords are saved with the company
and access to them is granted through the plug-in which adds security
to the network.
4. Use search function site: to search any domain specifically to find a page you lost.
Have you ever been browsing deep in to a website at work and found
something interesting that you want to share? Then later, you go back to
that site and cant find the path you took to access the page. Use the
search operator, site:website.com, in Google search to have google
search just that site. You can add a keyword after the operator to
narrow down the pages on that site.
5. In Chrome, leave a bookmark name empty to only display the icon and take up less space.
Is your bookmark bar in Chrome getting a little too crowded? Right
click a bookmark, select edit, delete the name field and leave it blank,
save. This will leave what is known as the favicon which is usually the
logo of the site. If you need more room on the bookmarks bar use
folders to further organize.
6. Use Adblock to filter out the advertising.
Sick of advertisements on your favorite content sites like Mashable
and Digg? Download the plug in Adblock to filter those ads out of your
browsing experience. There’re products available that block ads at the
network level giving you an ad free experience on any device in your
home.
7. Hover links to see their destination pop up in the bottom left corner.
Simply hover of a hyperlink in Chrome, then look at the bottom left
corner to see where the link will take you. This is good for browsing at
work and avoiding NSFW websites.
8. Hold command when you click on a link to open it in a new tab.
Want a link to open in a new tab but not sure if it will? Hold
Command on a Mac or Control on a PC as you click to have it open in a
new tab. You can also configure the scrolling wheel on your mouse to do
the same function on click.
9. Highlight a term or phrase that you want to search for in Google, right click and click “search in Google.”
Simply highlight any term or phrase, right click and select search in
Google, the Google search will open in a new tab, saving you some
clicks in the process.
When you delete or empty recycle bin files, they are not actually
deleted. The file which is deleted from the recycle bin stays in the
hard drive as raw data,only the file name from the table of content or the file system attributes is deleted. This
action indicates the hard drive that free space is available where a
new file can be written or saved. Hence, the files that are deleted from
the recycle bin are not permanently erased and can be recovered before
the free space is overwritten with a new file or data.
Hence, it is possible to recover files that are deleted from the recycle bin using a file recovery software
One of the most used quick recovery tool is RECUVA.
Recuva is a free utility software that let’s you undelete files after
you have emptied your recycle bin. It has unique scanning methods
including a “deep scan” feature to use when the standard scans aren’t
working. Steps to Use RECUVA: Step 1: Download Recuva onto a drive other than the one that you want to recover files from. DOWNLOAD RECUVA HERE Step 2: Run Recuva.
You will be seeing a wizard tab asking you what type of file you want to
recover. If you aren’t sure then just choose “All Files”.
Step 3: Next you will be asked where the files are
located. If these files were deleted from the recycle bin then choose
“In the Recycle Bin”. Step 4: You are now ready to start your scan. This
is also where you can choose to Enable Deep Scan if Recuva is having
trouble finding the file. Step 5: Once the scan has finished, you can now
choose the file you wish to recover. Select the file and click the
“Recover” button. Choose a location that is not on the drive you are
trying to recover from, otherwise, you may overwrite your file.
Yet another good recovery software is RESTORATION.
Restoration too, requires no install and because of this, you can put it
on your flash drive and take it with you wherever you go. The quality
feature of this software is that, you can focus solely on a file format
that you want to recover specifically, thus limiting the outcome to a
particular search criterion by means of a search term or a file
extension. It does not matter if it is a FAT or a NTFS file system,
Restoration has the ability to work with any of them. Steps to use RESTORATION: Step 1: Download Restoration onto a drive other than the one that you want to recover files from. DOWNLOAD RESTORATION HERE Step 2: Run
Restoration. If you are using Windows 7 or Windows 8 then you may have
to right-click Restoration and choose “Run as Administrator”. Next,
choose the drive you wish to scan. If you know the file name or at
least part of it, type it onto the “All or part of the file” box. You
can check the box “Include used clusters by other files” but if this
applies to the file you are trying to recover, then it will probably be
corrupt. You can now click “Search Deleted Files”. Step 3: When it finishes scanning, you can search
through the file list to find the file that you would like to restore.
Once you find it, highlight it and click “Restore by Copying”. Step 4: You will now be asked where to save the
file. If you try to save it to the same drive you are scanning you will
be asked if you would like to select a different drive so you don’t
overwrite the original data. Once you have finished restoring the file
you should be able to open it.
These two softwares are very quick, practical, easy to use and
effective, you do not even need to install the program, and so in this
way it will leave no trash in your system. It is also free. So you know,
if you have accidentally deleted a file and think it’s the end of the
world, do not be alarmed, there’s a simple and free solution.
If you have any suggestion about other good recovery softwares, don’t forget to give us a feedback.


